How Programiz PRO Makes Learning to Code Truly Interactive
The best way to learn programming is by interacting with code — writing, testing, and fixing it yourself. That’s why, at Programiz PRO, we’ve designed a learning experience where you don’t just read about coding — you actually do it, every step of the way.
How Programiz PRO Makes Learning to Code Truly Interactive
Interactivity is one of our core principles at Programiz PRO. It is rooted in our founder Ranjit's experience teaching programming.
When teaching programming to his friends, Ranjit often saw them making common mistakes, like:
Print("Hello, world!") — using uppercase P when writing print, or
print"Hello, world!" — missing parentheses.
These mistakes happened repeatedly, almost every day. That's when he realized:
No matter how much he simplified the concepts and explanations, they grasped coding properly only when they wrote code themselves.
That's how hands-on, interactive learning became one of our core principles. We decided that no matter what, we'd make learners write code themselves on Programiz PRO.
This experience, along with our learnings from launching a YouTube channel(which now has over 180k subscribers), led us to stick with text-based learning.
With YouTube, we realized that even if we created high-quality video courses, we couldn't know if our learners were practicing what they learned after watching them. And we weren't comfortable with this.
Hence, we landed on our two core principles — text-based, interactive learning.
What do we mean when we say Programiz PRO is interactive? What will you find within?
We've made sure the learning experience you get is as hands-on as possible. This means you'll find opportunities to:
play around with examples of new concepts,
test if you remember what you learned,
type code yourself, and
develop your logical and problem-solving skills as you learn programming.
Now, let's get into the specifics of how we enable these, plus more.
A Built-in Code Editor
Since our goal was to make learners code from day one, what better way to enable that than to integrate code editors into every lesson?
That's precisely what we did!
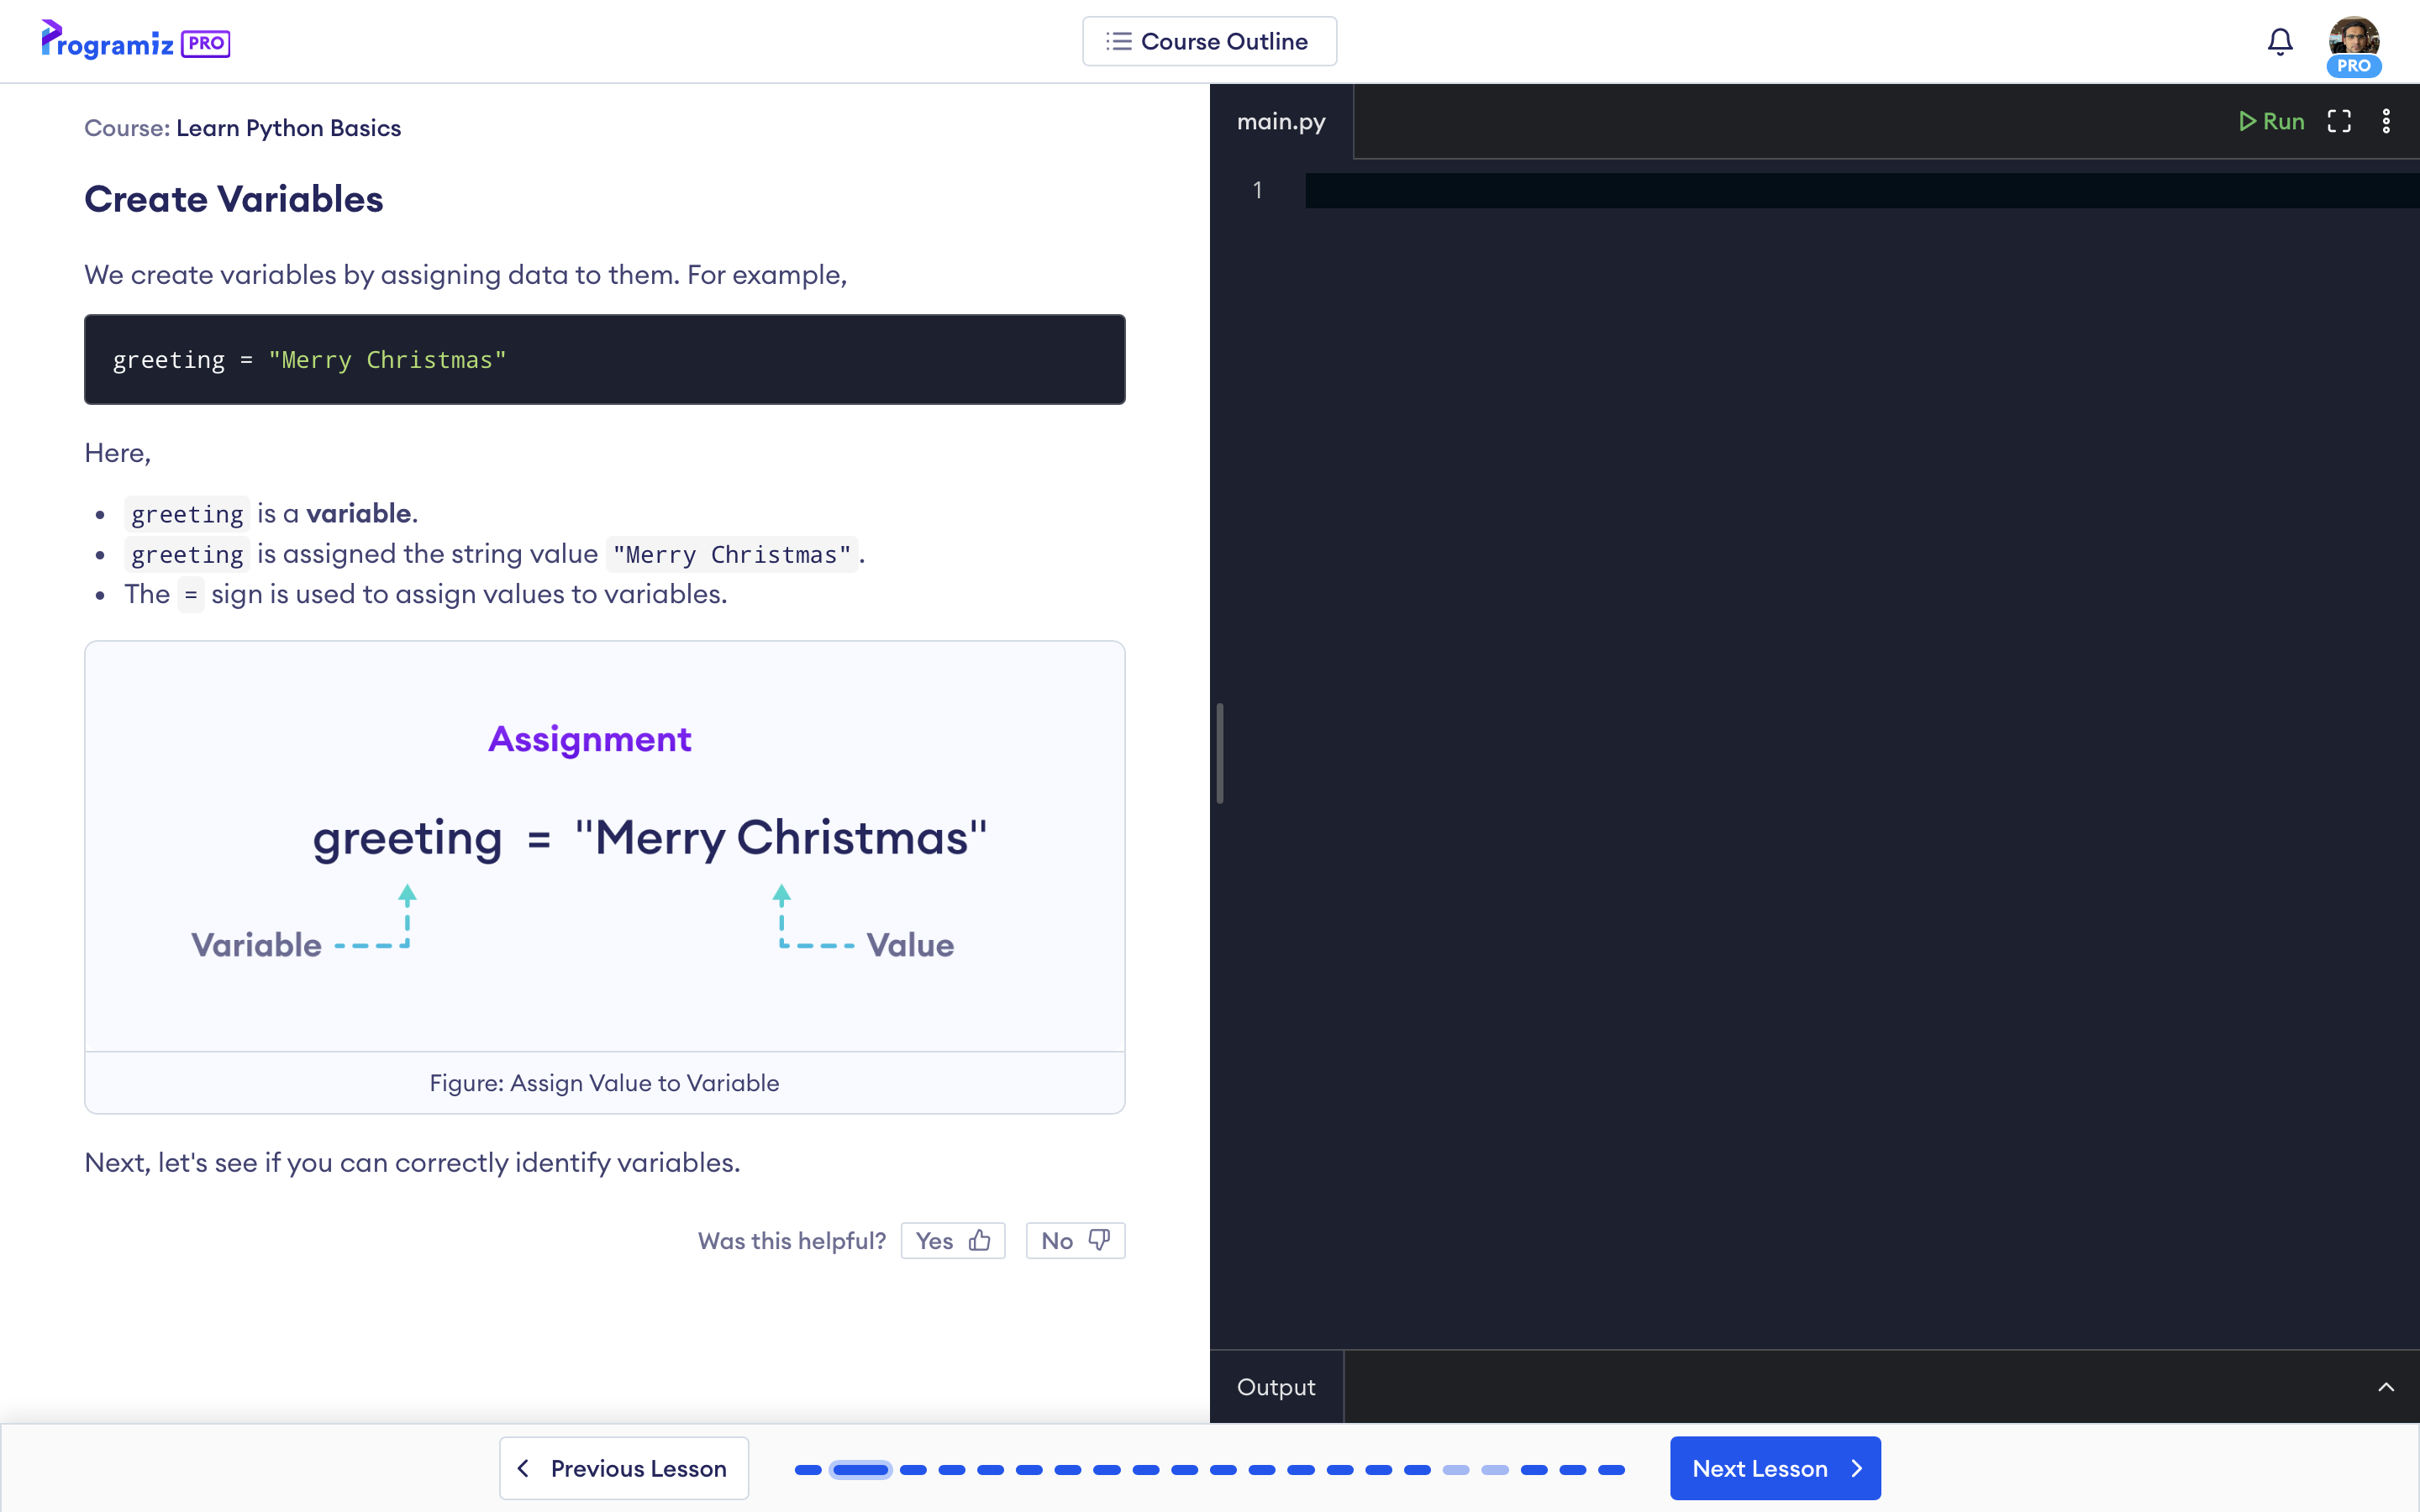
You'll find code editors on the right side of every lesson page on Programiz PRO.
In these editors, you can write and run code, experiment, make mistakes, and learn through them. Based on the course you enroll in, you'll find different versions of our code editor.
"I really appreciate the sandbox-style code editor within the courses, which makes learning new concepts more hands-on." - Simon Fankhauser
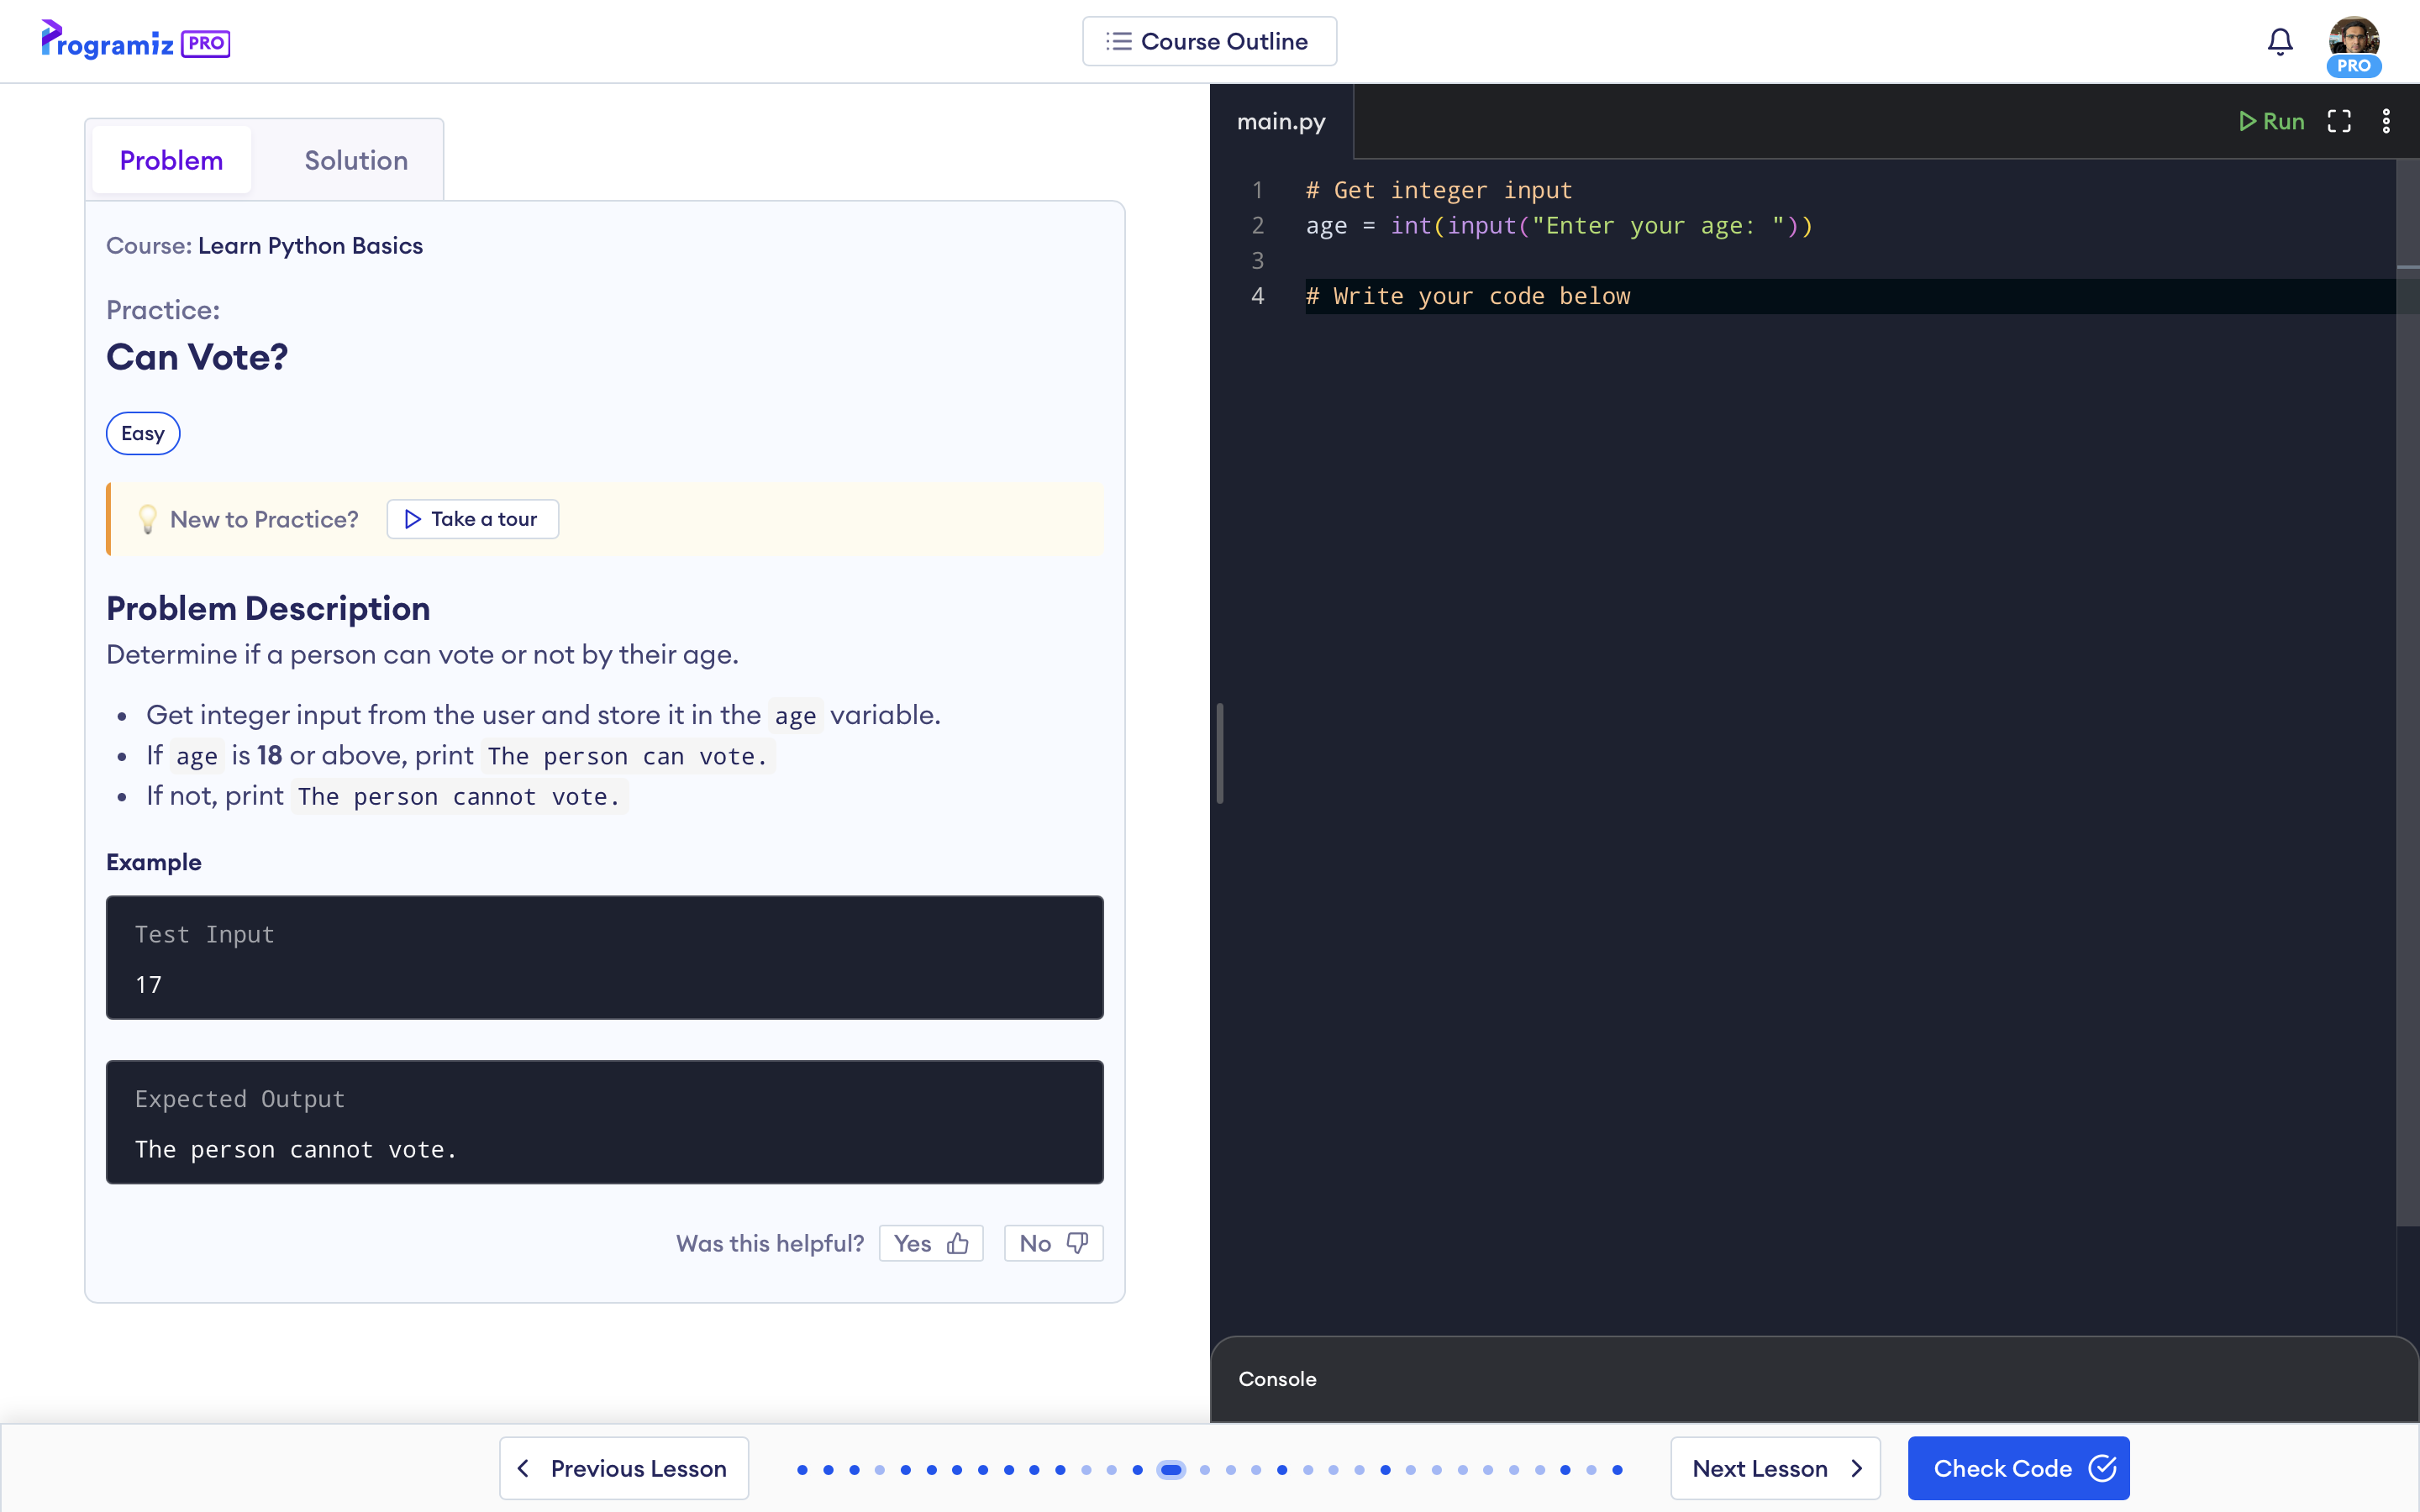
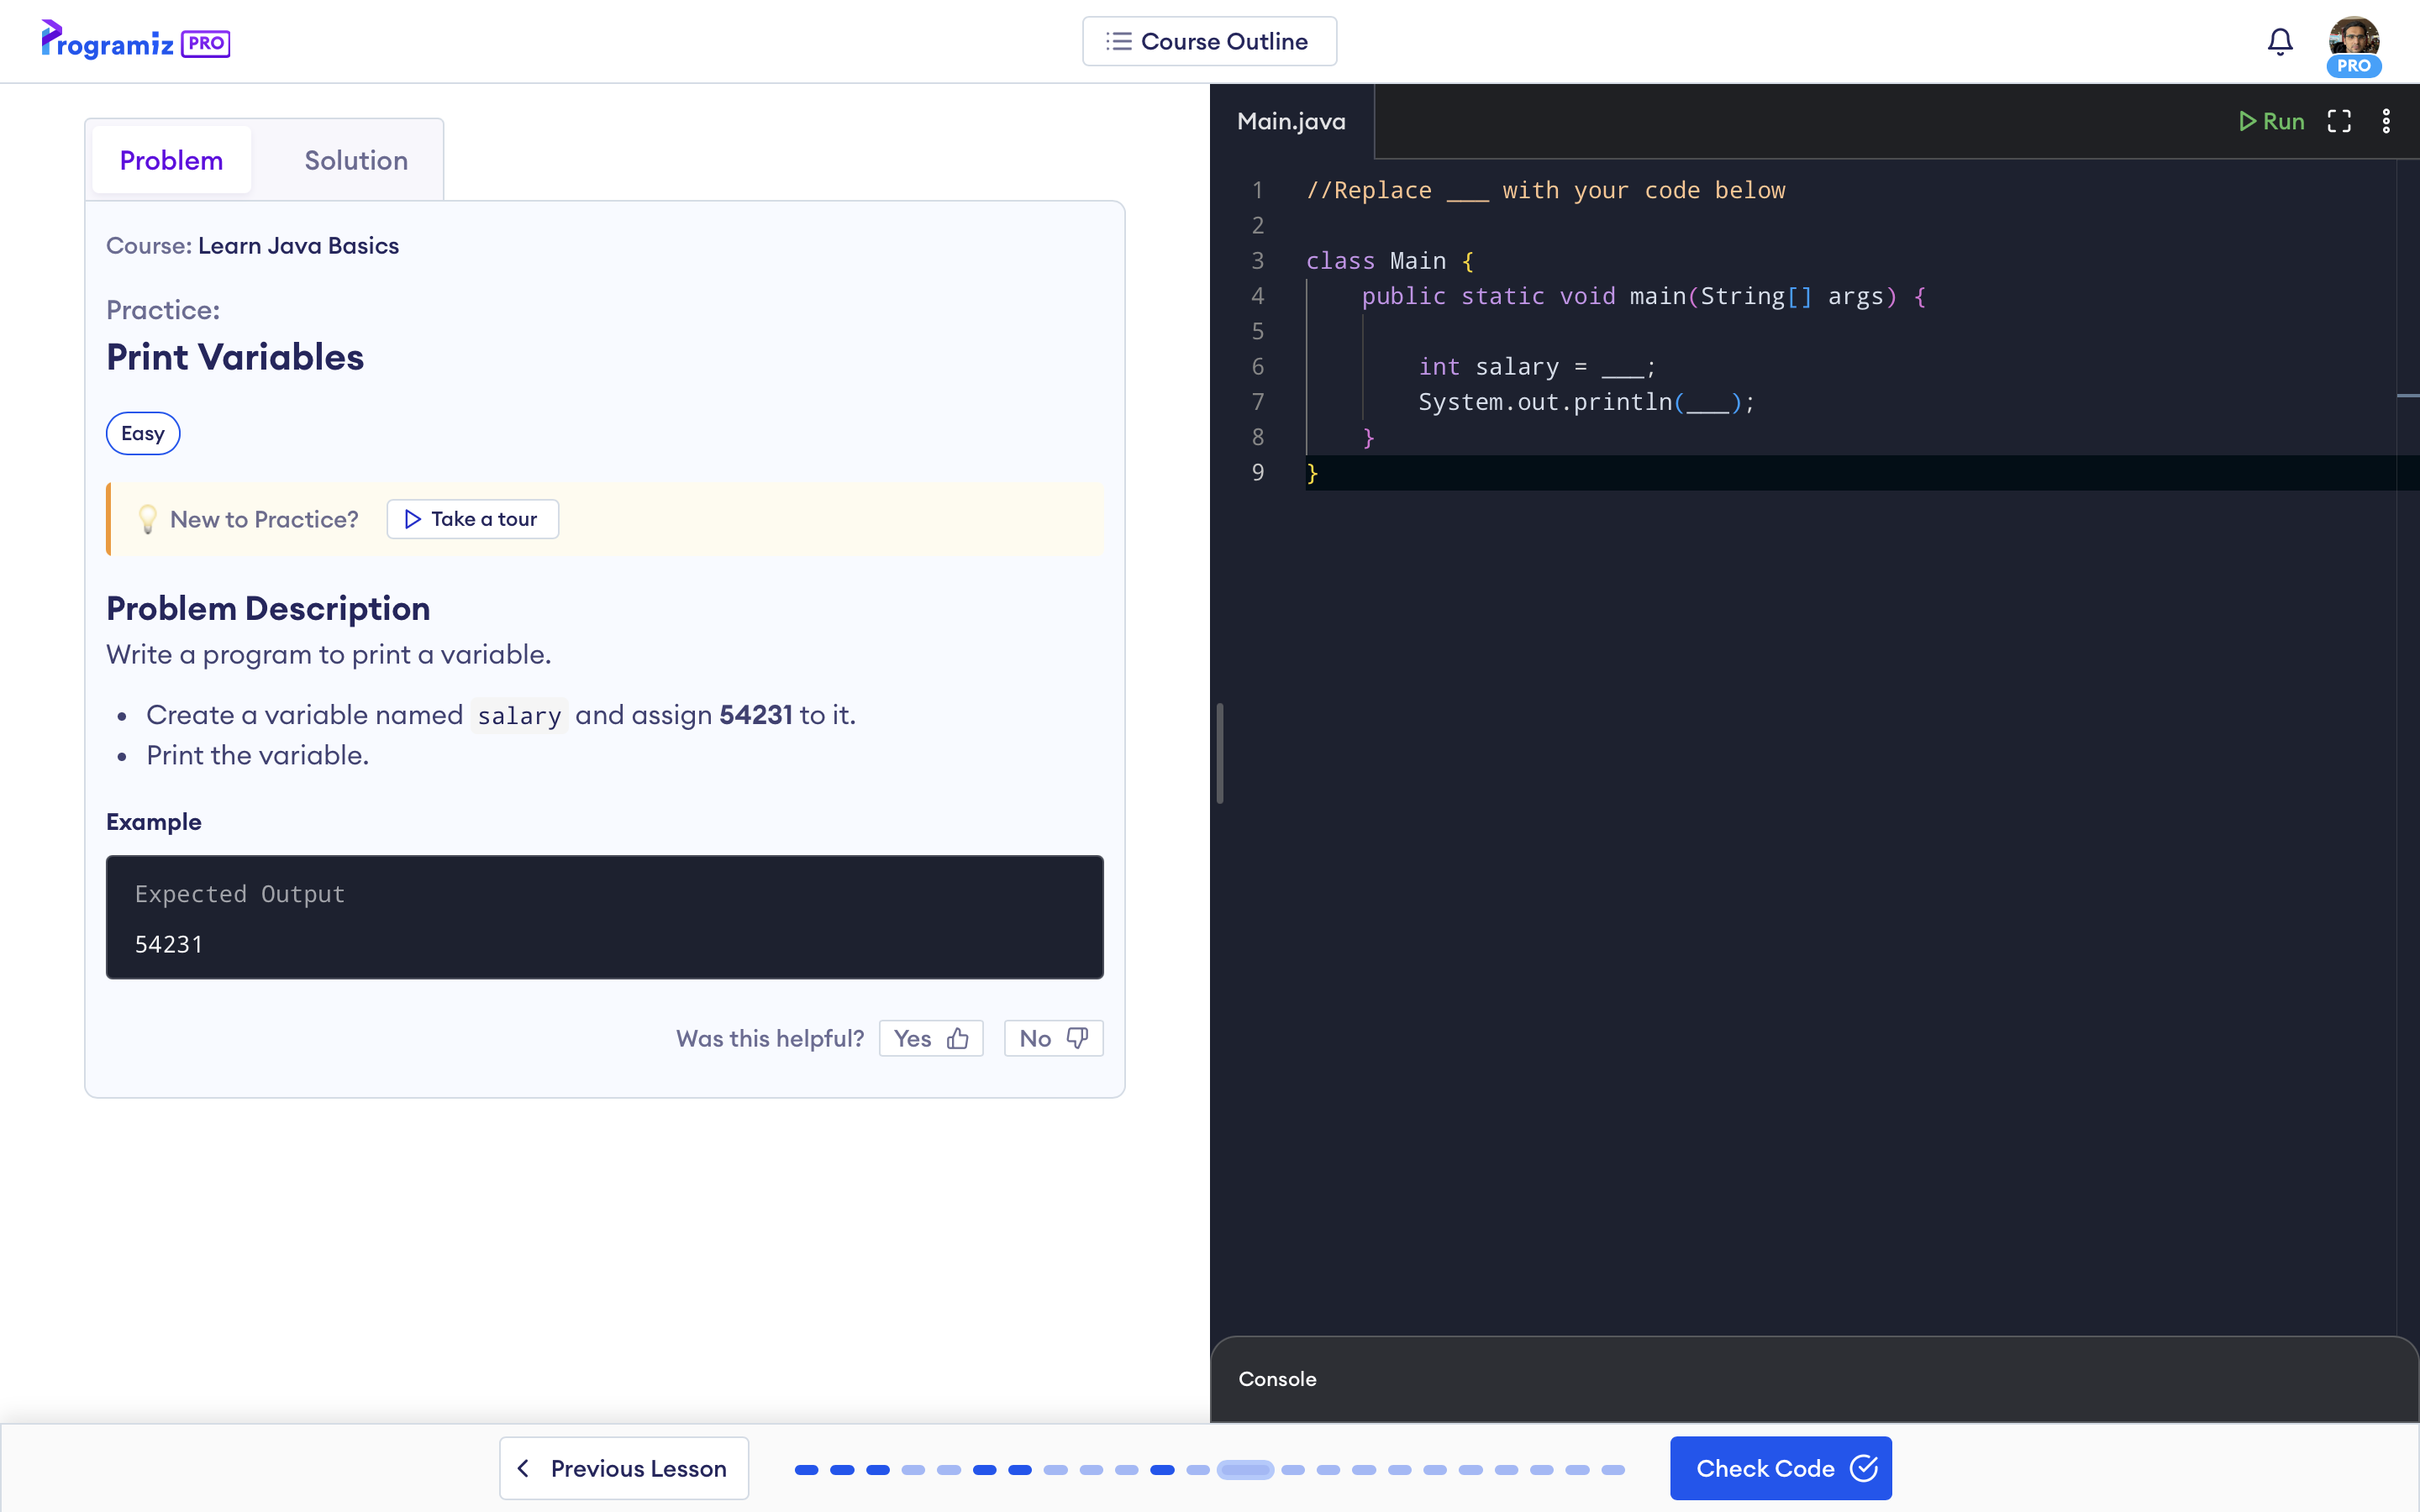
Courses for languages like Python, C, C++, and Java have a simple code editor. It has a section to write your code and a section for the output of the code, like the one above.
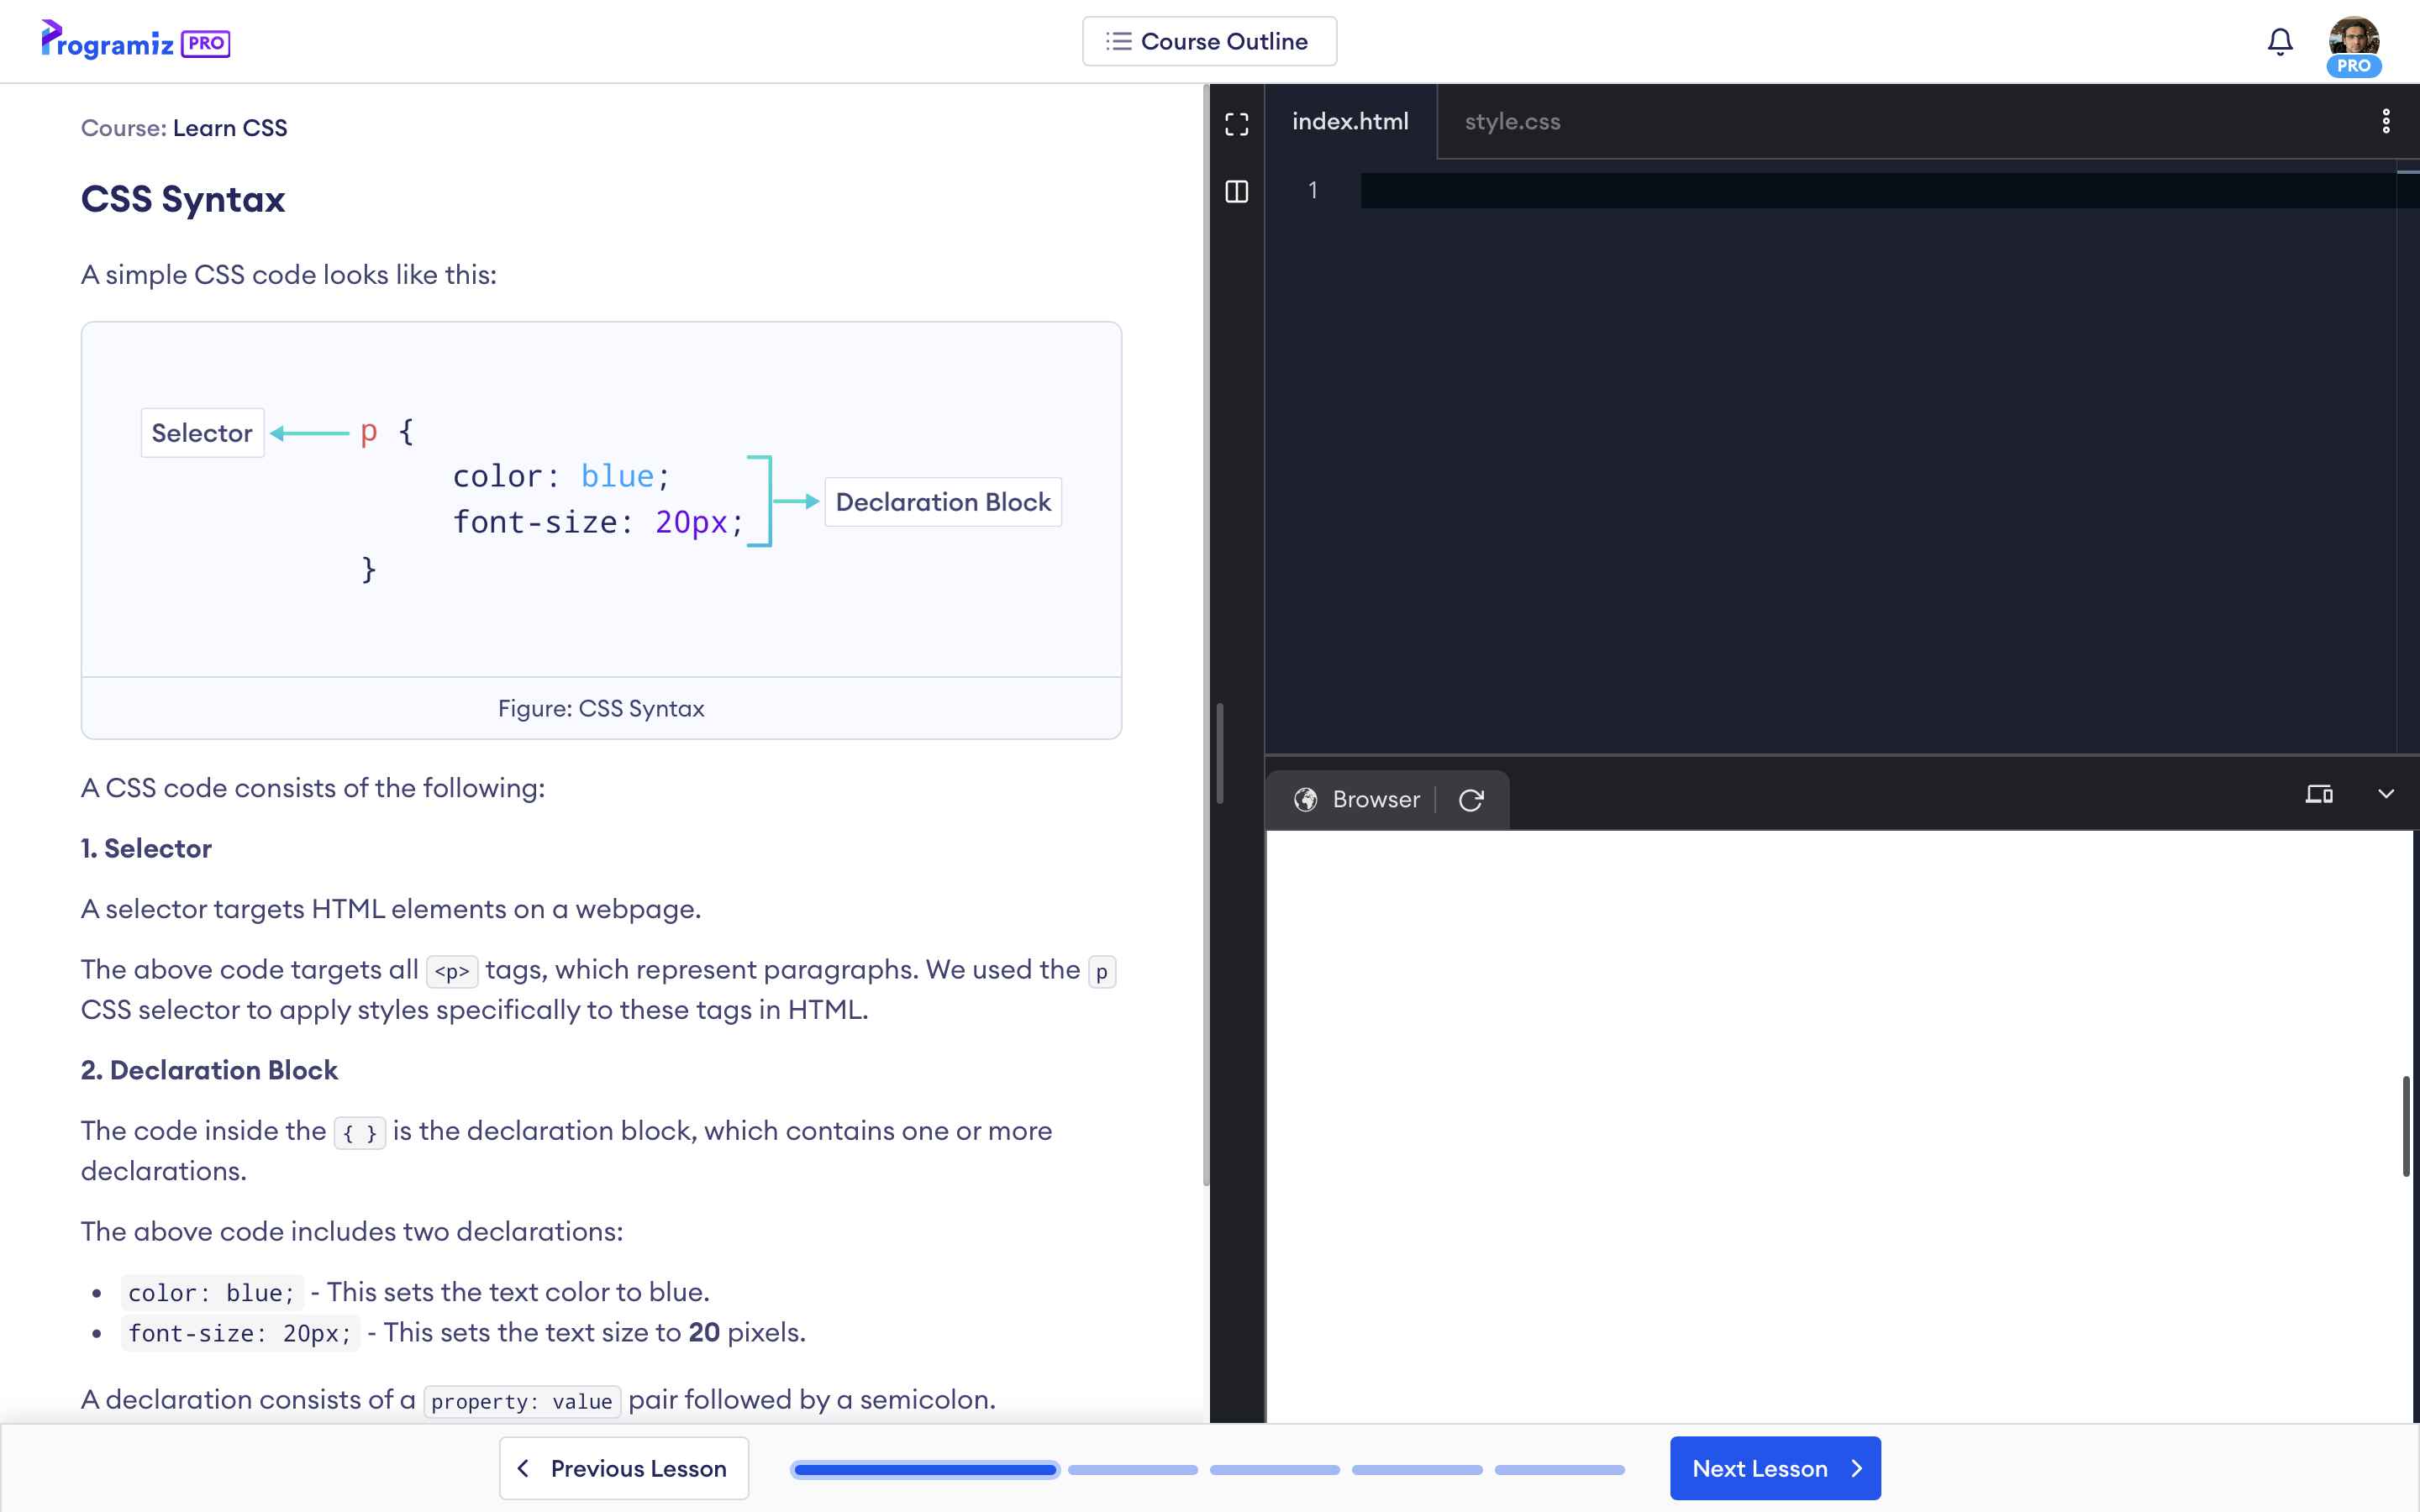
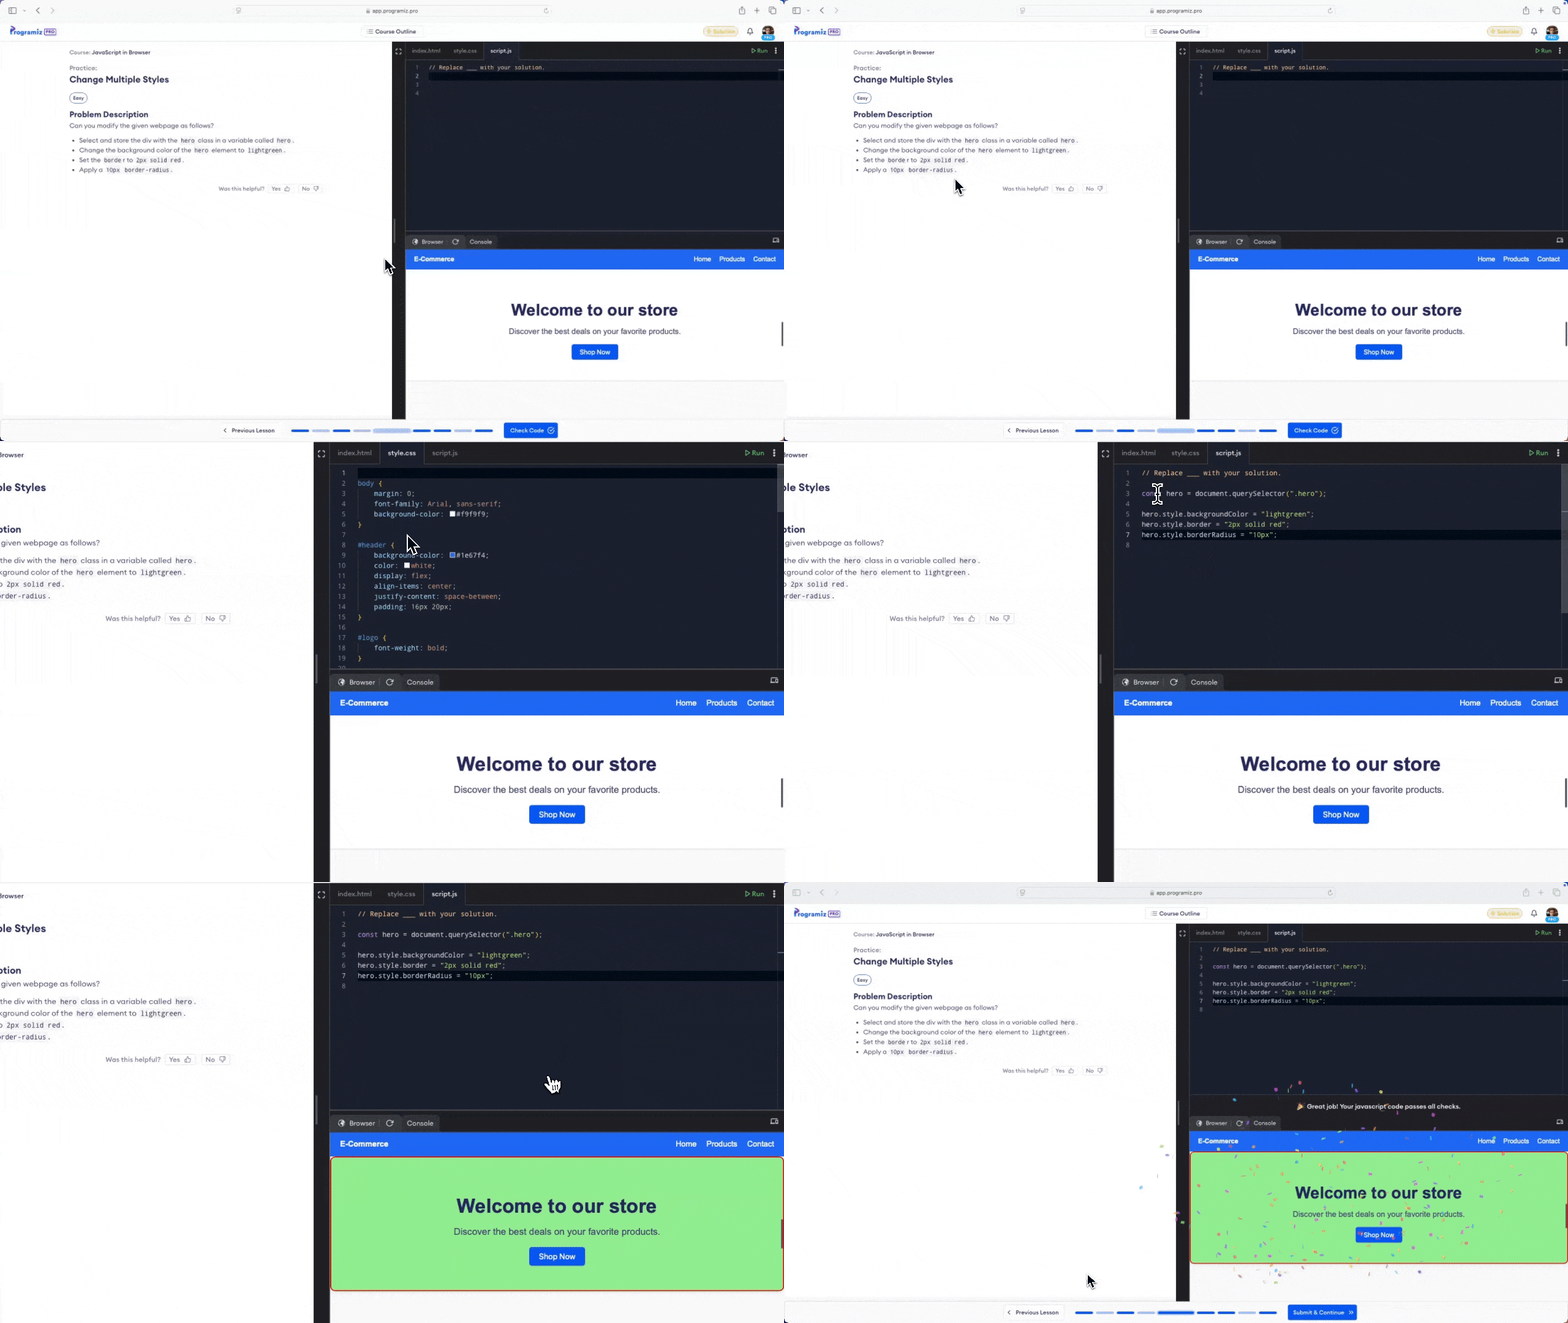
For courses like HTML, CSS, and JavaScript, we built a code editor which gives you the full web development experience on your browser itself. It has:
Multi-tab layout with separate file support for HTML, CSS, and JavaScript.
A browser rendering to give you a proper experience of how web development works.
A 'Console' section for you to test and debug your code.
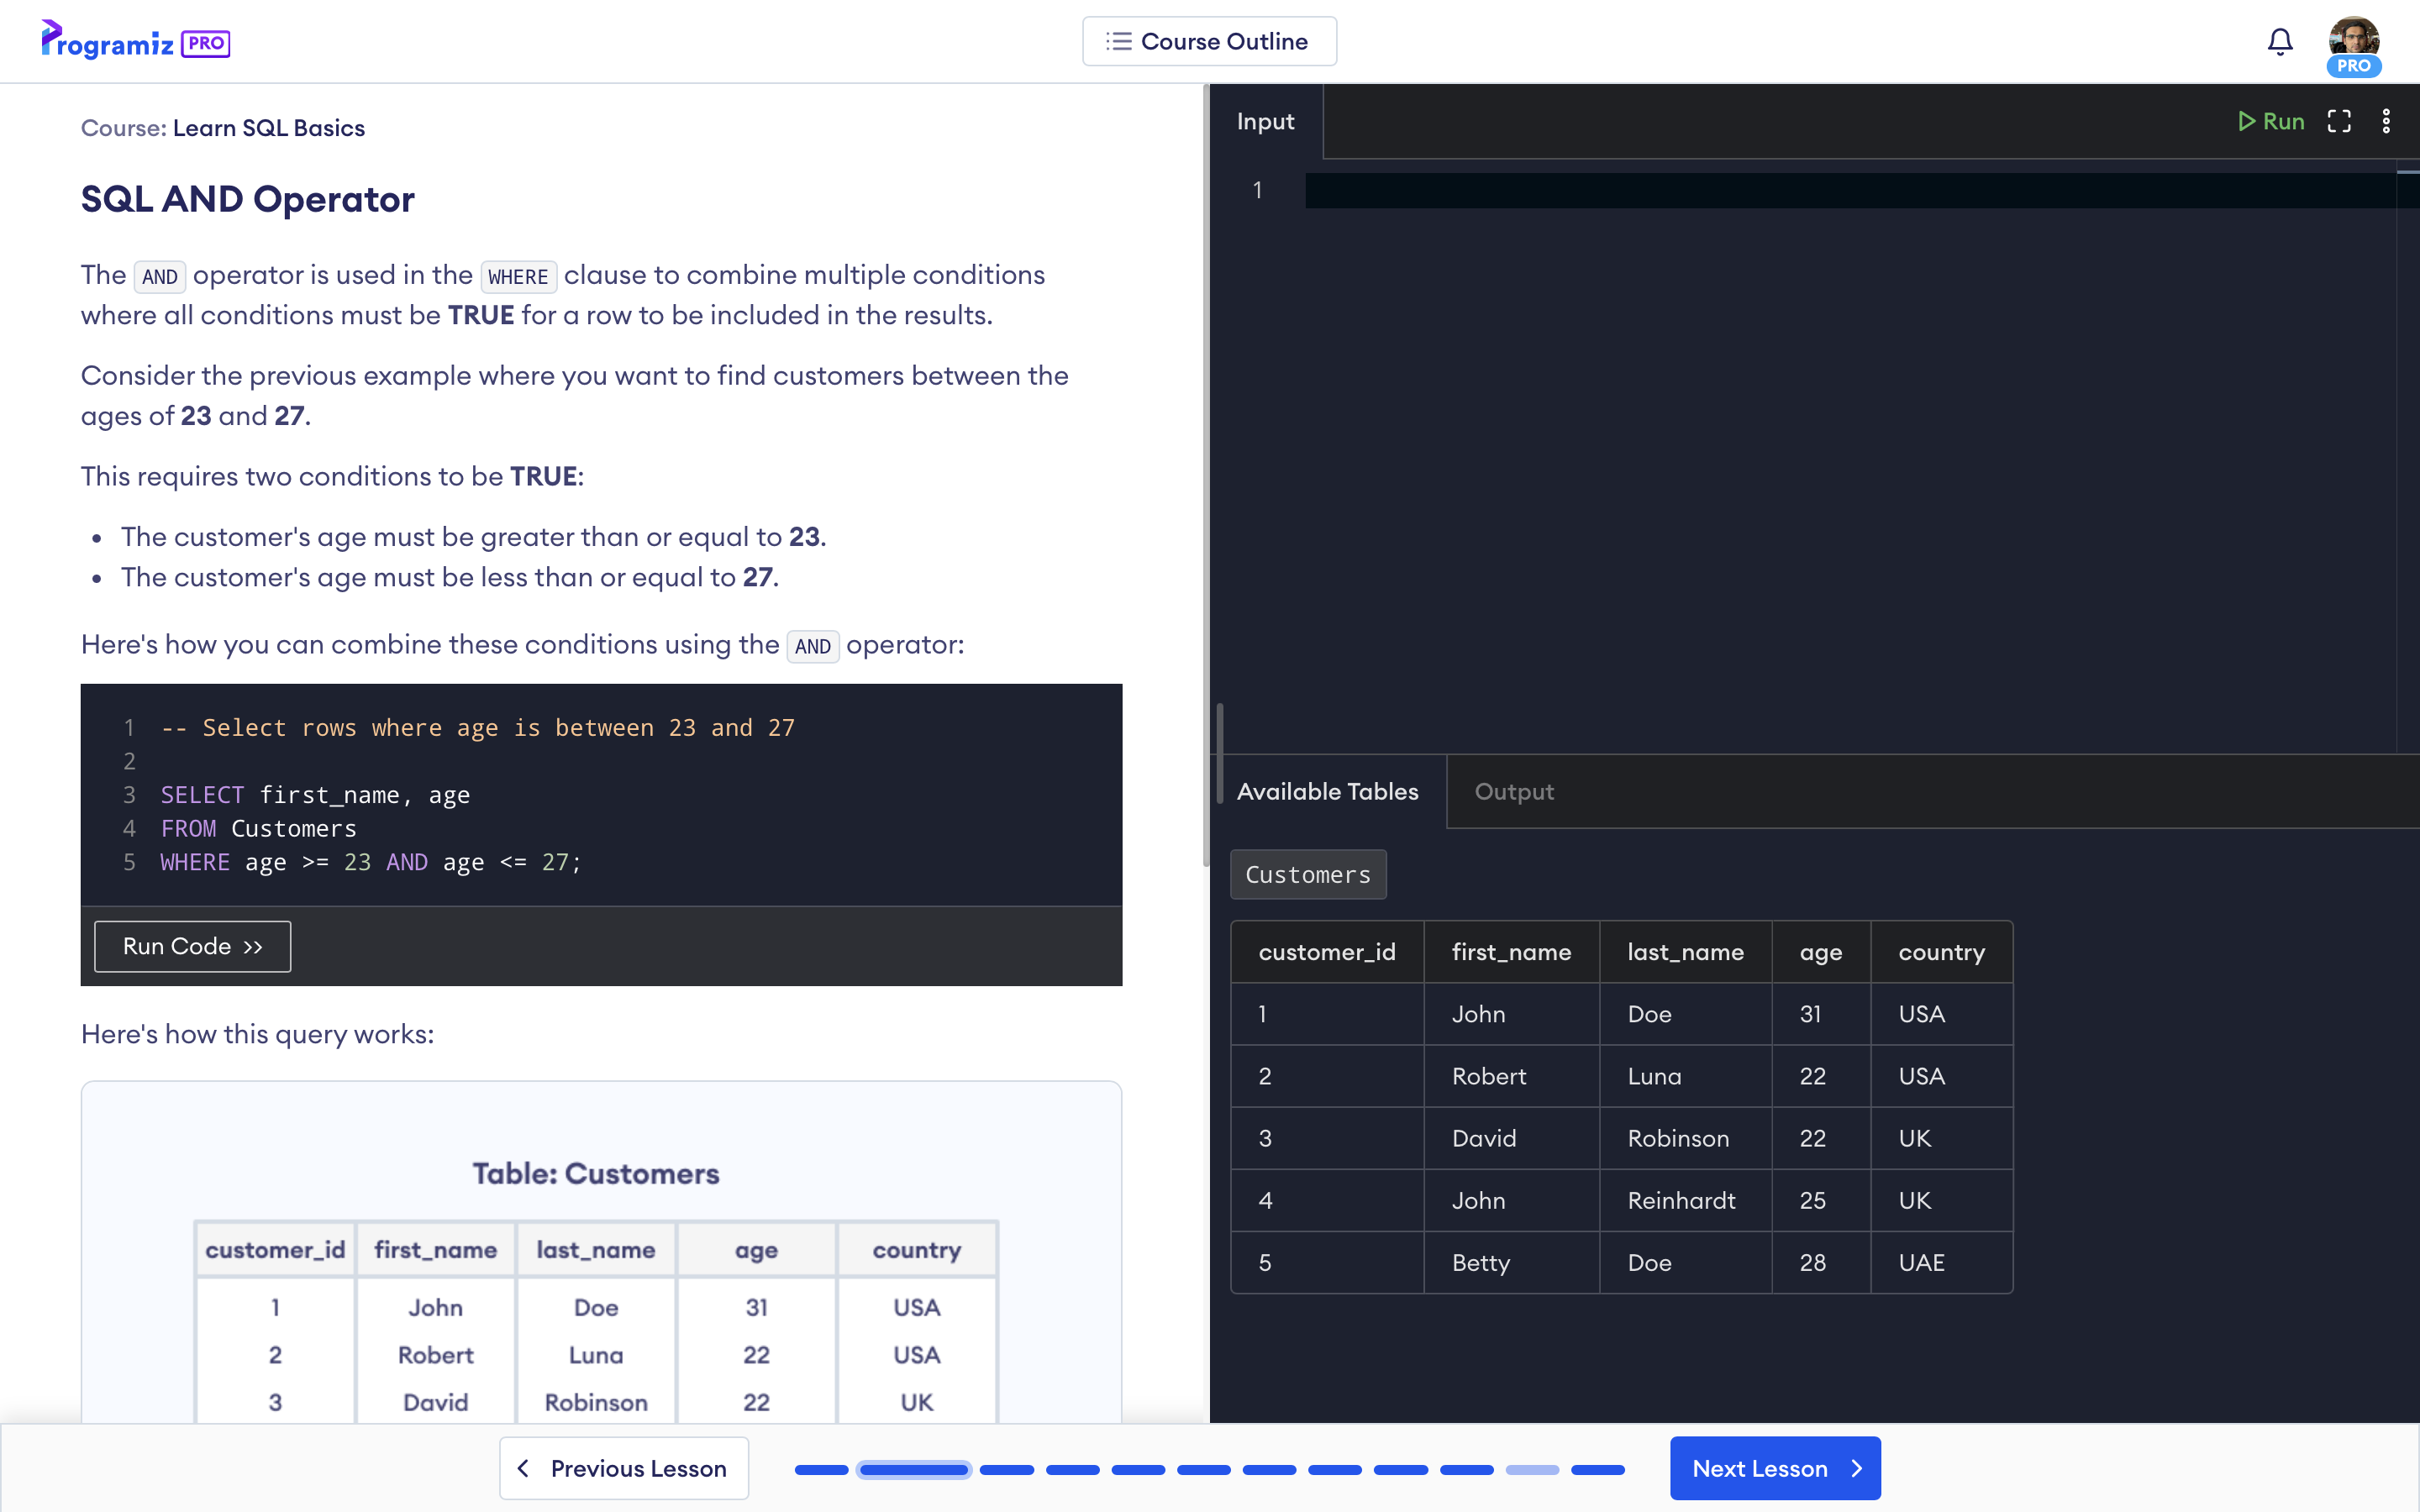
Similarly, for our SQL courses, we incorporated 'Available Tables' tab in the code editor. This lets you practice queries with pre-built datasets.
Executable Examples
Throughout our courses, you'll find we use a lot of example code to explain new concepts. But examples mean nothing if you can't see how they work.
So, we made our code examples interactive.
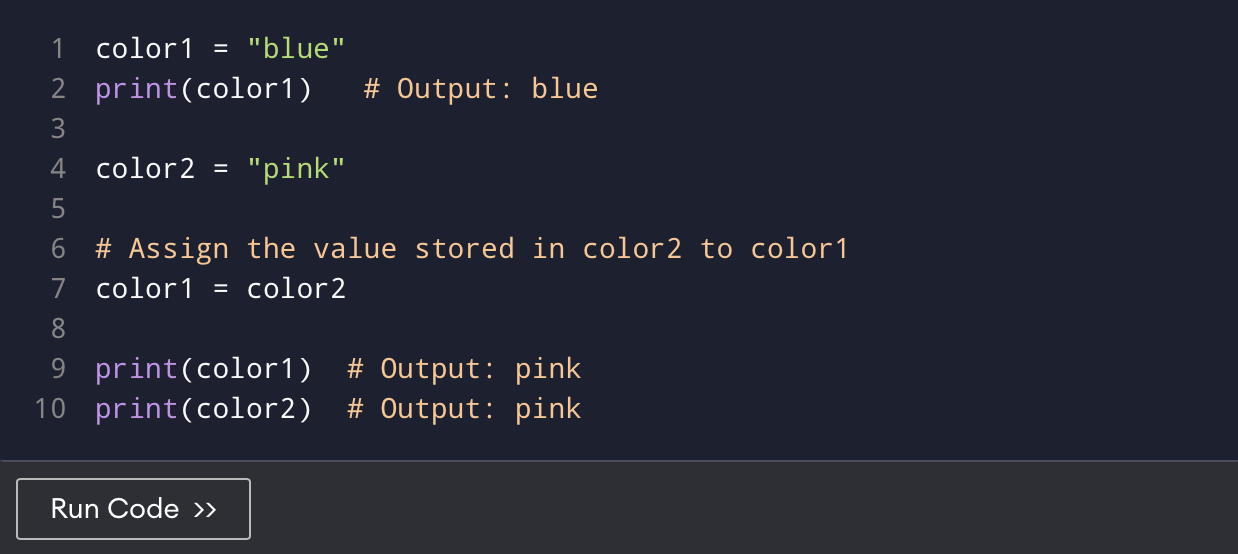
Each of our code examples is executable. This means you can run them using the 'Run Code' button and see what it does on the code editor.
You can also make changes to these example code, like swapping variables, removing quotes, and changing conditions on if-else statements and loops, giving you room to get hands-on and experiment.
Quizzes
Quizzes are one of the most loved features of Programiz PRO, and there are two key reasons behind this:
How we strategically place them at key points in the course.
How we design them to be more than mere tasks or assessments.
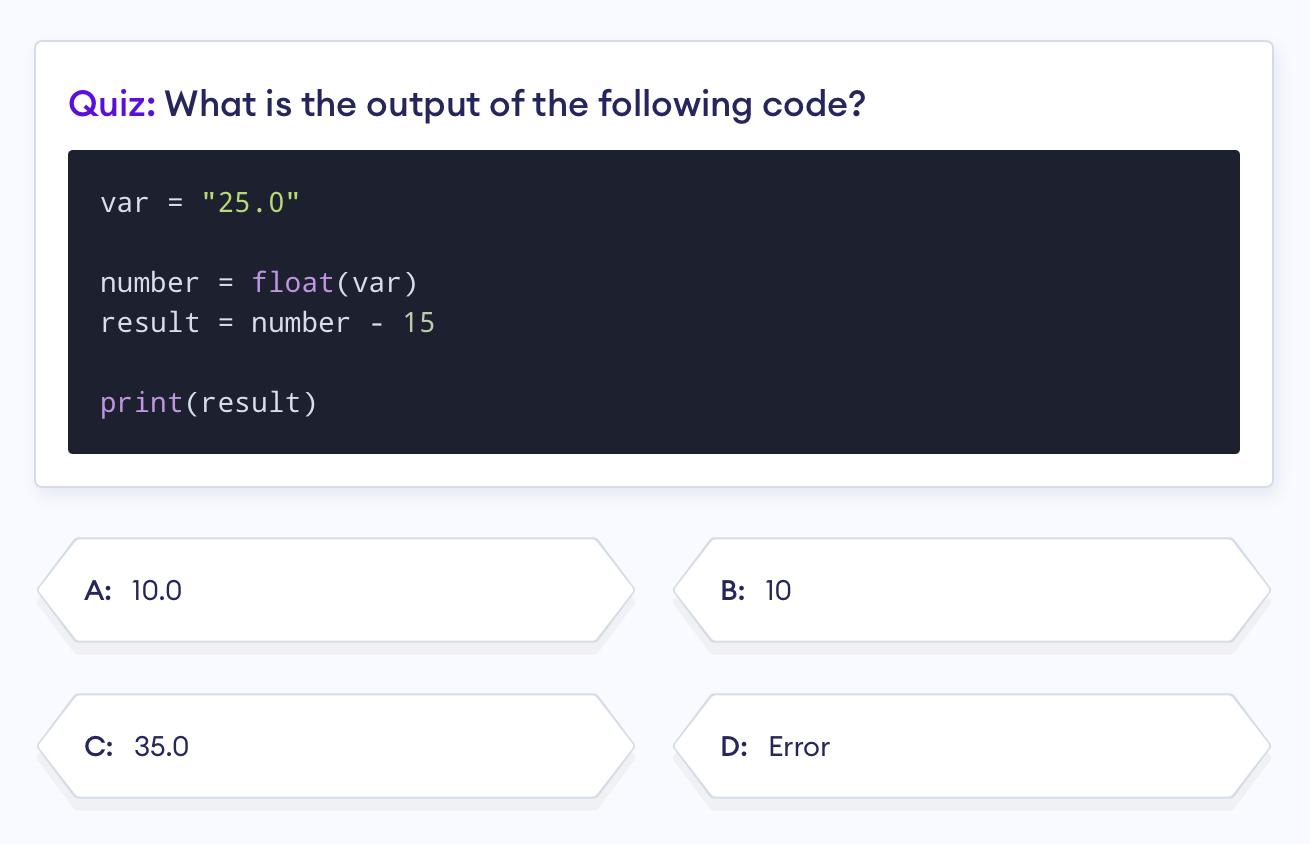
We've integrated quizzes at key moments — right after introducing a new concept. This serves three important purposes:
It immediately reinforces what you just learned.
It ensures you understand and retain the concept.
It reiterates the importance of certain concepts.
But we didn't just create quizzes to test your knowledge — we designed them as learning opportunities.
For every incorrect answer, you receive a clear explanation of why the option is wrong. Similarly, for every correct choice, there's an explanation of why it's right.
On the surface, it's a small addition. But it adds so much to your learning experience. Not only does it elevate how you experience quizzes, it also helps fill your knowledge gaps.
Practice Problems
Practice problems are at the core of interactivity in Programiz PRO. Here's how the learning flow works:
You learn a new concept.
Go through code examples.
Solve quizzes to check your understanding.
Then, you solve a practice problem related to that concept.
Throughout the course, you'll encounter hundreds of practice problems. You can't move forward without solving the practice problem, ensuring you apply what you've learned before moving on to the next concept.
We designed practice problems to improve your logical thinking and problem-solving skills. These problems help you build muscle memory, reinforce concepts, and develop a hands-on approach to coding — all essential for becoming a proficient programmer.
"I really liked that in addition to the interactive quizzes, you had challenges where you could find your errors and check your work against the right answer." - Claire Collins
"I get to immediately apply what I learn, which keeps me engaged. And I loved that I couldn't move on to the next step until I completed the current one — it made sure I truly understood the material." - Tanya Giterman
So, how do practice problems work?
Let's start with the problem descriptions.
The problem description contains everything you need to know to solve the practice problem — a problem statement, a short description, and instructions on how to solve it. You'll also find:
examples of test cases,
expected output,
tables in case of SQL course, and
a preview of what your output should look like in courses such as HTML, CSS, and JavaScript in Browser.
Now, let's talk about the code editor in practice problems.
Like in the normal lesson pages, the code editors here, too, work differently for different languages.
There are a few common elements, though. You'll often find comments, placeholder code, or half-written code in the editor when you're solving practice problems. This is to teach you how to structure code when you're first learning the ropes.
But, here are the differences between practice problems in these distinct courses:
1. Python, C++, Java, C Programming, JavaScript, SQL
The practice problem code editor is fairly simple for these languages. You write your code in the top half of the editor. Your 'Console,' where you see outputs, error messages, and test cases, is usually on the bottom half.
2. HTML/CSS
HTML/CSS are web development languages, which means they deal with visuals and designs. So, the code editor in practice problems for these languages are slightly different.
Firstly, you'll see multiple tabs for HTML and CSS. This is because we usually work with HTML and CSS in different files.
Then, instead of a regular 'Console' where you'd see the output of your code, these practice problem editors have a section that simulates a web browser. Whatever HTML or CSS you write, the output is reflected in this window.
And since this process works in real time, you don't need to run your code every time you make a change.
3. JavaScript in Browser
JavaScript in Browser course is especially designed to give you that real-time feel of working with HTML, CSS, and JavaScript together, like how you would in a real browser.
The code editor looks similar to how it does on HTML/CSS courses. However, since you're working with all three, you'll see both 'Browser' and 'Console' tabs in the output section. The 'Browser' will show the real-time changes to what you're building, and the 'Console' will show any errors that you get from JavaScript.
Now that you know how to navigate the practice problems, here are the steps to solving them:
Read the problem description carefully and understand the requirements.
Write your solution code in the code editor.
Run the code using the 'Run' button.
Check the result in the output console.
A few things can happen after you run your code.
1. Your code fails to run.
If your code fails to run, it means you have made a syntax error. Don't worry — these are common, especially in the beginning.
When this happens, you'll get an error message on the console which tells you exactly what's wrong with your code.
Read the error message carefully — it usually points to the exact line with the issue. Then make changes in the editor, and click 'Run' again to test your fix.
In the beginning, it can be difficult to understand error messages. You might even be stuck sometimes and feel like giving up.
For times like these, we've integrated sensAI, a personalized AI mentor, into each practice problem.
It won't write your code for you or solve these practice problems, though. It only explains where you're going wrong — in plain English — so you become a better programmer in the long run.
If you want to know more about sensAI and all its capabilities, head over here.
2. Your code runs successfully but fails the test cases.
Test cases are different scenarios and inputs which we test your code against. They're important because they check if your code is versatile enough to work in different scenarios.
Within practice problems, the output of your code has to be the same as what the test cases expect.
When you fail a test case, it means your code has a logic error. Or simply put — the output your code gave didn't match the test case's output.
So, how to deal with failed test cases?
The console will tell you exactly where you went wrong and which test cases your code failed. Compare the expected outputs with yours, which helps you understand what's going wrong.
You can then tweak your code, run it again, and see if that changes the result.
3. Your code runs successfully and passes all test cases.
In this case, congratulations! You pass the practice problem and can start learning something new on the next page.
This is how learning to code usually is — you learn something new, you write code, you get a few errors, and you fix them along the way. This trial-and-error is important as it teaches you to tackle errors one step at a time, think critically, and push through frustrations.
Of course, if you're really stuck, you can always use sensAI's help or take a peek at the solution. But always try it on your own first.
At Programiz PRO, we believe programming is a skill — one that can only be mastered through practice. That's why we've built our courses around hands-on learning.
Through executable examples, interactive quizzes, and practice problems, we make sure you're not just reading about programming but actively engaging with it. Every error message, every test case, and every attempt at solving a problem makes you a better programmer.
We've designed Programiz PRO so beginners get the hands-on experience they need to build confidence in coding. Instead of passively consuming information, you'll write, test, and debug your own code — just like a real developer.
Ready to experience it for yourself? Enroll in a course and dive into interactive learning today!